aDDa For All ===> Free downloads | eBooks | Softwares | SMS | Fun | News | Codes | Techie | Music | Movies
Aug 29, 2009
Ads Theme Template
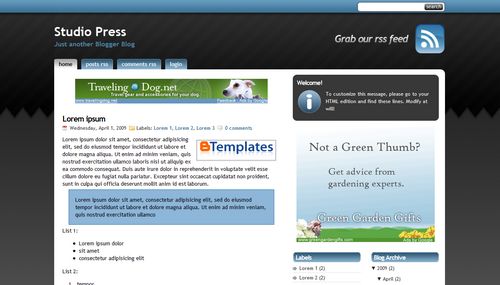
If you’re looking for a new Blogger template, you came at the right time. Hands down, this is the best template we’ve converted here at eBlog Templates. It’s a wonderful web 2.0 popular blog layout with some great built in ad spots (hence the template name) and features.
It’s either a two or 3 column template (you can change it on the fly) so you get the best of both worlds. This Blogger template is what I call a “powerhouse” template since almost all the features you need are already built in. On top of that, it’s quite easy to setup and makes your blog look like a professional site without much effort.
I predict this template will be a top template on this site within a few months, if not weeks. With the amount of effort that went into converting this template and attention to details, I sure hope you appreciate this free amazing new xml Blogger/Blogspot template.
Features Include
- Two or Three right side columns which are easy to switch (default is three)
- Three great location ad spots (header banner 468 x 60, three 125 x 125 buttons in sidebar, and a 468 x 60 AdSense banner above the first post)
- Integrated Feedburner rss and subscribe via email sidebar module (also includes “add to favorites” Technorati link)
- Built-in live traffic feed widget from FEEDJIT
- Built-in MyBlogLog and BlogCatalog recent reader widgets
- Dynamic tabs easily created by editing the link list widget
- Search box without the need for a “go” button
- Recent posts and comments widgets
- Nicely designed individual blog post comments section
- Properly setup Blogger layout editor
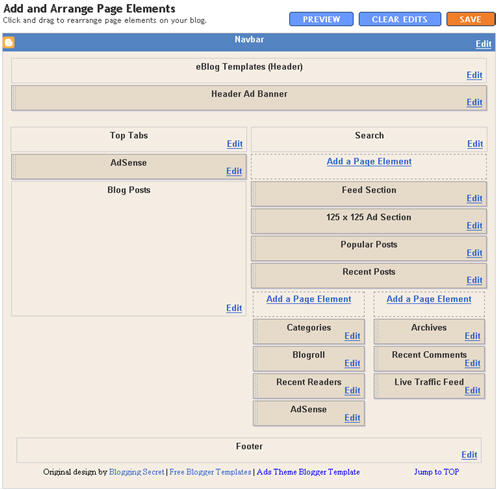
You can see from this screenshot that the actual editor is nicely setup so you don’t need to scroll or try and figure out how to click on the “edit” widget links. Most templates that you download make it tough to edit — not this one!
This template does require some configuration in order to get it working as designed. Please follow the steps below if you’d like it to work properly. I also recommend backing up your existing template before changing just in case you run into any problems. You could also setup a new Blogger blog as a test area and try installing it there first.
Top Tabs Setup
When you first install this template the top tabs will not be visible which is normal. You’ll need to go into the Blogger page element layout editor and edit the “Top Tabs” widget. It’s a link list so just add whatever tabs you want. Don’t add a “Home” tab since it will automatically appear once you create and save the tab widget.
Header Ad Banner
The default banner is hardcoded into the template but will disappear when you add anything to this widget. It’s an HTML widget so you can put the banner ad code straight into this box. This widget can also be deleted if you don’t have a 468 x 60 and you’ll just be left with the black header. Here’s the default ad code if you want to use it as a model:
FeedBurner RSS and Email Links
To get this section working you’ll first need to have a FeedBurner account. If you don’t already have one, please read the “How to Setup FeedBurner on Blogger” article and then come back. Another option is to just delete this widget if you’re not interested in knowing your subscriber count or allowing your readers an easy way to subscribe.
Once you’ve got your FeedBurner account, you’ll need to edit this template code and replace a few parts. Search your template code for the following line
and then look right below that for the rss feed link.http://feeds.feedburner.com/YOUR-FEED-NAME-HERE
. Replace the text in red with your FeedBurner name (i.e. eBlogTemplates is ours)Next we’ll need to update the subscribe via email link with your feed id. You’ll need to make sure to enable subscribe via email within FeedBurner otherwise this part won’t work.
http://www.feedburner.com/fb/a/emailverifySubmit?feedId=YOUR-FEED-ID-HERE&loc=en_US
After you’ve changed both of these areas save your template and check to see if it works. If you’re having trouble finding your feed name or id, please read our article above or see FeedBurner’s help section to locate it.
125 x 125 Ad Section
These are the three ads in the right sidebar which you need to edit the template code to change. Search the template code for and then look right below that for the three lines of ad code which are:
If you’ve got ads to place in here, then just paste the code into the template. I recommend signing up for your ownText Link Ads account and using them. Each referral you convert, you get $20 (or $25 I forget). If you don’t have ads to use, you can either leave our default ads or delete this widget altogether.
Recent Posts and Comments Widgets
This one is easy to setup since we’ve already written an entire article dedicated to this. Please see “How to Setup Recent Comments and Posts Widgets” to configure these two widgets.
Recent Readers Widget
You’ll need to have MyBlogLog and BlogCatalog accounts if you want to use this widget. The default widget will show the original author’s pictures so please either delete this widget or change the account ids to your own. Once you’ve setup these up, then edit the template code and search for
and then replace the account numbers with yours.Live Traffic Feed Widget
This is a really cool feature within this template and the best part is you don’t need to do anything to setup it up! There are some further options if you click on “options >>” on your actual blog page under the widget but that’s it.
You should now have the template all setup and ready to go. I hope you enjoy this beauty and please make sure to keep the footer links intact since numerous hours of my time and the original designer were put into making it. That’s all we ask for giving away this template! Enjoy!
Special thanks to Eric over at Blogging Secret for designing this wonderful template originally for WordPress.
Revision History
Update (3/3/08) - Per a couple requests and to make this template even more flexible, I’ve changed how underlined links are handled. You can now edit the underlined color via the Blogger “Fonts and Colors” section along with 10+ additional other color variables. Less work for you having to mess with the .css template code now.
Update (3/5/08) - Added in post author tags so you can toggle the “By Author Name” within the posts. Also compressed the css so the file is much slimmer and cleaner.
Update (3/14/08) - The individual posts Google AdSense code block was missing and has now been added to the template code.
Update (4/18/08) - Fixed layout screen so the two widgets aren’t overlapping.
Ready to super charge your blog? Check out our professional premium blogger templates or make money by joining our blog affiliate program!
Want to make your blog stand out from the crowd? I recommend giving your newly downloaded Blogger template a unique and personalized look. Read our Free Blogger Header Images article and find yourself a great custom header image!
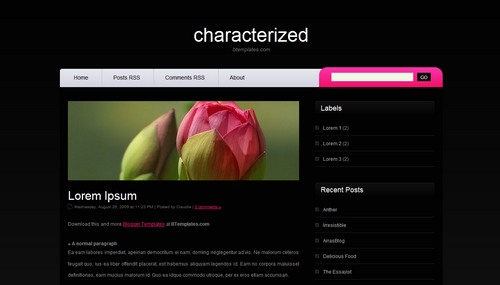
Langit Template
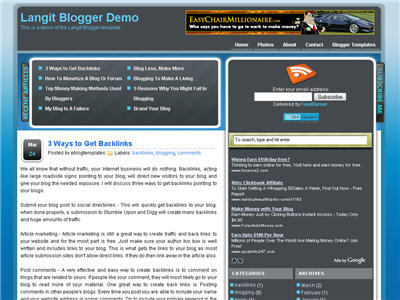
Langit is the latest and coolest “make money” blog template to hit the scene here at eBlog Templates. It’s a very modern, web 2.0, 3 column, black and blue template with a ton of features including some never before used in a Blogger template! We really try to push the limits with our latest and greatest templates and know you’re going to love this one.
This template will work right out of the box but in order to personalize it just for you, it’s going to take some work. You’ll need to edit the template code which is usually for more experienced Blogger users but anyone is welcome to try of course. The difficulty level is a 9/10 so be prepared to sit down and spend some time setting this template up.
Features Include:
- Several different types of highly optimized “Make Money” ad spots
- Built-in FeedBurner rss and subscribe via email area
- Top box displaying your 10 most recent posts (yes I said 10)
- Calendar style date on each individual post
- Header banner rotator
- Dynamic top tabs so you can easily add them
- Custom comments section
- Live website traffic widget from FeedIt
- And much more…
This is the first ever Blogger template that includes a very cool header banner rotator so you can randomly display several different banners in one spot! View the demo and try reloading the page a couple times to see it in action. There are four different banners sharing that spot.
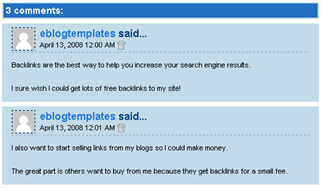
Here’s a quick screenshot of how the comments section looks on this template. It’s very unique and not your boring Blogger-style look which makes the Langit template so special.
Let’s Configure this Template!
Ok, you’ve got your beverage of choice, a comfortable chair, and are now ready to setup this new template for your blog. We’re going to start from the top and work our way down and I advise you to make backups of your template along the way. Also, always remember to check the “expand widget templates” checkbox in the edit html window of Blogger otherwise you won’t see the entire template code. Let’s begin.
Step #1 - Setup Your Header Banner
The 468 x 60 header banner is a great spot to advertise and you’ll see this spot being used on many websites. The banner spot on this template is an HTML/Javascript widget so you can easily paste in whatever code you want. You actually have several options so choose the one that works best for you.
Option 1 - I don’t want to mess with the code now right now and can always come back later. Let’s keep the existing banners. This is also a good choice if you don’t have any banners to use at this time. If you don’t have any banners to use, I recommend signing up for at least one affiliate program like Text Link Ads, or LinkWorth which will give you banners. If you click on the banners in the demo, it will take you to the sites where you can sign-up.
Option 2 - I don’t like ads and want to remove it. Sure, just delete the widget from your blog.
Option 3 - I only have one banner and don’t want to use the banner rotator script. Ok, no problem. Just edit the banner widget and paste in your single banner code. It will automatically remove the banner rotator and replace it with your new banner.
Option 4 - I’ve got plenty of time and a few banners and want to set this thing up now. Perfect! In order for you to get your banners to work properly, you’ll need to run the javascript banner rotator script (you’ll need to have your banner images hosted somewhere before using the banner rotator script otherwise it won’t work) to give you the proper code and then just paste it into the banner widget box within your layout page. This will automatically remove the default banner rotator and replace it with your new banners.
Step #2 - Setup Your RSS Feed Using FeedBurner
Before moving forward, I recommend you first read our article on the basics of setting up FeedBurner for Blogger if you don’t already have an account. After you get your account up and running, you’ll need to edit the template code to update the FeedBurner section.
First, search your template code for id=”top_rblock” which is where you’ll find the FeedBurner code. Next, replace the “YOUR-FEED-NAME-HERE”, “YOUR-FEED-ID-HERE”, and “YOUR-BLOG-NAME-HERE” text with your FeedBurner provided info. You’ll also need to activate the email subscription feature within FeedBurner. (read the bottom part of the article describing where you get the code). There are a total of 4 places you need to update so make sure you got them all.
You’ll also want to add your own feed counter which shows the total number of subscribers you have. You’ll need to activate this first under “Publicize” –> “FeedCount” and then scroll down to click on “Activate”. Now you can change the colors and copy the code to use in your Blogger template. You’ll want to replace the following code in your template:
http://i254.photobucket.com/albums/hh92/eblogtemplates/langit/feed-counter.gif
with something that looks like this:
http://feeds.feedburner.com/~fc/myfeed?bg=99CCFF&fg=444444&anim=1
Now your feed count will automatically update whenever someone subscribes to your blog!
Step #3 - Add Top Tabs
This is pretty easy actually since the top tabs are generated via a link list. Just go into your Blogger layout page and click “edit” on the “top tabs” widget. There you can add as many tabs as you want. The “home” tab automatically appears so you don’t need to create one.
Step #4 - Setup Advertising Accounts
You’ll need to have the following 3rd party accounts setup if you want to make money and use this template as designed. The ads currently in this template are placeholders and will continue to work if you’d rather not hassle with setting up new accounts or changing the code so it’s up to you.
- Google AdSense - Allows you to display highly targeted text advertisements for you to make money (create an AdSense account)
- Chitika - Displays related products below each blog post. You get paid for each click! (create a Chitika account)
After you’ve got your advertising accounts all setup, you can move on and configure the ad sections in this template.
Step #5 - Configure AdSense Sidebar 336 x 280 Ad Unit
You’ll first need to be familiar with Google AdSense and how to setup a new ad before changing this code. Make sure to use the matching colors which will not only make it blend in with your blog but will also increase clicks. The color scheme is as follows: border & background: 44494D, text & url: FFFFFF, and title: D7DFF0. Once you’ve got your new 336 x 280 AdSense block of code, you’ll need to convert it using our Ad Code Converter.
Take the output of that and then replace the existing code in the template. To find the code in the template, search for “adsense code start”.
Step #6 - Configure Chitika 468 x 90 Ad Unit
This is the ad unit you’ll find right below each blog post. It’s called “Related Products” and is a great way to make money from your blog. Each time someone clicks on your link, you get paid! It’s a PPC program (pay per click) just like Google AdSense but it’s run by Chitika. Check out the template demo and see for yourself. Try clicking on any of the links and see where it takes you. Much different than Google AdSense.
So after you’ve setup your account, you’ll need to create a new 468 x 90 Related Product Unit (RPU). You can generate the code by clicking on the “Get Code” tab within Chitika. Then it will walk you through creating an ad unit. You can even change the colors which we did on our ad unit (title: 2277DD) so it matches our site better.
Next, grab the code and then you’ll need to convert it using our Ad Code Converter. Take the output of that and then replace the existing code in the template. To find the code in the template, search for “chitika code start”.
Step #7 - Get Your Individual Post Date Stamp Working
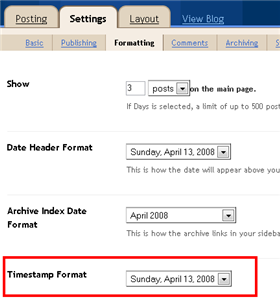
Chances are when you first install this template your timestamp format won’t be set properly and you’ll see an “undefined” message instead of the post date. You’ll need to make one small change in your “Settings” => “Formatting” => “Timestamp Format” section before it will work. Change whatever you currently have to this format: “Sunday, April 13, 2008″ and then save. Make sure you change the “Timestamp Format” which is the 4th one down. Your template should now work properly.
Ok, that pretty much covers everything you need to properly setup this template. Oh, one more thing. On some blogs, the header blog name title is too wide and ends up wrapping which doesn’t look so good. You can easily change that by going into your Blogger “Fonts & Colors” section and making your title size smaller. Another option is to just shorten your blog name but I don’t think you want to do that.
Credits
This template was originally designed for WordPress by Eches and converted to Blogger by GosuBlogger. eBlog Templates saw a lot more potential with the nice template and decided to take GosuBlogger’s initial conversion to the next level by optimizing and adding several new features to help you make more money with your site.
Revision History
4/13/08 - Fixed json entry.title.$t javascript error so the template now validates correctly in both IE and FF.
4/14/08 - Fixed another javascript error only affected in IE. It was the FeedBurner form action url. Also made the subscribe box a small pop-up window instead of a new browser page.
Ready to super charge your blog? Check out our professional premium blogger templates or make money by joining our blog affiliate program!
Want to make your blog stand out from the crowd? I recommend giving your newly downloaded Blogger template a unique and personalized look. Read our Free Blogger Header Images article and find yourself a great custom header image!
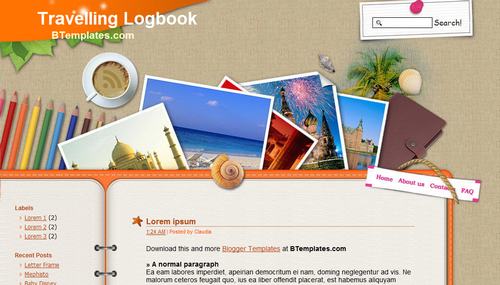
Linux Application Development
Linux Application Development, Second Edition, is the definitive reference for Linux programmers at all levels of experience, including C programmers moving from other operating systems. Building on their widely praised first edition, leading Linux programmers Michael Johnson and Erik Troan systematically present the key APIs and techniques you need to create robust, secure, efficient software or to port existing code to Linux.
This book has been fully updated for the Linux 2.6 kernel, GNU C library version 2.3, the latest POSIX standards, and the Single Unix Specification, Issue 6. Its deep coverage of Linux-specific extensions and features helps you take advantage of the full power of contemporary Linux. Along the way, the authors share insights, tips, and tricks for developers working with any recent Linux distribution, and virtually any version of Unix.
Topics include
Developing in Linux: understanding the operating system, licensing,and documentation
The development environment: compilers, linker and loader, and unique
debugging tools
System programming: process models, file handling, signal processing, directory operations, and job control
Terminals, sockets, timers, virtual consoles, and the Linux console
Development libraries: string matching, terminal handling, command-line parsing, authentication, and more
Hundreds of downloadable code samples
New to this edition
The GNU C library (glibc), underlying standards, and test macros
Writing secure Linux programs, system daemons, and utilities
Significantly expanded coverage of memory debugging, including Valgrind and mpr
Greatly improved coverage of regular expressions
IPv6 networking coverage, including new system library interfaces for using IPv6 and IPv4 interchangeably
Coverage of strace, ltrace, real-time signals, poll and epoll system calls, popt library improvements, Pluggable Authentication Modules (PAM), qdbm, and much more
Improved index and glossary, plus line-numbered code examples
New 30 Beautiful Vista For XP
New 30 Beautiful Vista Themes For XP
A nice selection of themes Vista for Windows XP.
OS: XP
Quantity: 30 pieces
New 30 Beautiful Vista For XP
New 30 Beautiful Vista Themes For XP
A nice selection of themes Vista for Windows XP.
OS: XP
Quantity: 30 pieces
Subscribe to:
Posts (Atom)